Affiliate Disclosure: VapingParts.com participates in affiliate programs. When you click our links and make a purchase, we may earn a commission at no extra cost to you.
Why Building Your Own Coils Is Worth Learning
Building your own vape coil might seem intimidating if you have only ever used pre-built coil heads. The idea of wrapping wire, threading cotton, and somehow making it all work can feel like a serious leap from simply screwing in a new coil and vaping. But the reality is far less complicated than it appears, and the rewards are substantial.
A hand-built coil tailored to your preferences will outperform most pre-built coils in flavor delivery. You gain complete control over resistance, surface area, and heating characteristics. You save significant money since a spool of wire and a bag of cotton cost less than a single pack of replacement coils and last for months. And there is genuine satisfaction in crafting something yourself that performs beautifully.
This guide walks you through building your very first coil from start to finish. No prior experience assumed. No steps skipped.
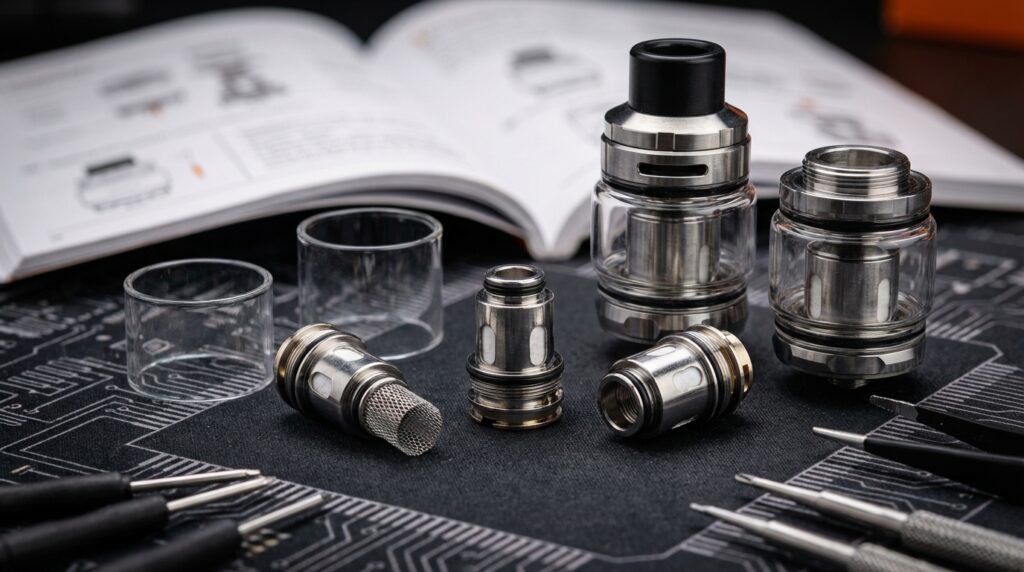
What Supplies Do You Need?
Before you start building, gather these essential supplies. You do not need everything on this list for your first build, but the starred items are mandatory.
- Wire *: Kanthal A1 wire, 24 gauge. Kanthal is the most forgiving wire type for beginners. It has a predictable resistance, does not require temperature control, and is easy to work with. 24 gauge provides a good balance between ease of wrapping and vapor production.
- Cotton *: Organic Japanese cotton pads (like Muji or Puff) or specialized vape cotton. Cotton Bacon is excellent and easy to work with.
- Coil jig or small screwdriver *: You need a round rod to wrap your wire around. A coil jig with marked sizes is ideal, but a 3mm screwdriver or drill bit works fine. A 3mm inner diameter is perfect for your first build.
- Wire cutters *: Sharp flush-cut wire cutters for trimming excess wire leads.
- Ceramic-tipped tweezers *: For pinching and adjusting coils while pulsing. Regular metal tweezers will cause a short circuit if you use them on a fired coil.
- Ohm reader or regulated mod *: To verify your coil resistance before use.
- Scissors: For trimming cotton.
- Small Phillips or flathead screwdriver: For tightening post screws on your atomizer, if not included with the atomizer.
Step 1: Wrap the Coil
Take your 24 gauge Kanthal wire and your 3mm coil jig or screwdriver. You are going to create what is called a simple round wire coil, which is the most basic and reliable coil type.
Hold the wire against the jig with your thumb, leaving about 10mm of wire extending past the jig as a lead. This lead will be inserted into the post hole on your atomizer.
Wrap the wire tightly around the jig, keeping each wrap touching the previous one with no gaps. Apply firm, even tension as you wrap. Do not wrap so tightly that the wire overlaps or so loosely that gaps appear between wraps.
For your first coil, aim for 6-7 wraps. With 24 gauge Kanthal on a 3mm jig, this will give you a coil that reads approximately 0.5-0.6 ohms, which is a safe and comfortable resistance for most regulated mods.
Once you have completed your wraps, leave another 10mm of wire as the second lead and cut the wire from the spool. Your coil should look like a small, neat spring with two straight legs extending from each end.
Step 2: Mount the Coil
Every atomizer has posts with holes or clamps for securing coil leads. The specific method varies by atomizer, but the principle is the same: insert the leads, secure them, and position the coil.
For Post-Style Decks
Loosen the post screws. Insert one lead into the positive post hole and the other into the negative post hole. The coil should sit centered over the airflow opening, slightly above it. Tighten the post screws firmly but do not over-torque them, as stripping a post screw is annoying and potentially ruins the deck.
For Clamp-Style Decks
Open the clamp by loosening the screw. Lay the lead across the clamp surface, then tighten the screw to secure it. Repeat for the other lead. Clamp decks are generally easier for beginners since they are more forgiving with lead positioning.
After securing both leads, trim the excess wire extending past the posts with your flush-cut wire cutters. Cut as close to the post as possible without leaving sharp edges that could cause shorts against the top cap.
Step 3: Adjust the Coil Position
With the coil mounted, you may need to adjust its position. The coil should be:
- Centered over the airflow holes
- Level and not tilting to one side
- At the right height above the deck (usually 2-3mm for optimal vapor and flavor)
Insert your coil jig or screwdriver back through the coil and gently push or pull it into the correct position. If wraps have separated or become uneven during mounting, use the jig to re-center and align them.
Step 4: Dry Fire and Work the Coil
This is where your coil goes from a rough assembly to a refined heating element. Put your atomizer on your mod or ohm reader and check the resistance. It should read close to what you calculated. For 6 wraps of 24 gauge Kanthal on a 3mm jig, expect something around 0.5-0.6 ohms.
If the resistance reads unusually high (significantly above 1 ohm), a post screw may not be making good contact with the lead. Retighten your screws. If the resistance reads near zero, you have a short circuit. Remove the coil, check for wire touching the deck or cap, and remount.
Once the resistance reads correctly, set your mod to 20-25 watts and pulse the fire button in 1-2 second intervals. The coil should glow orange starting from the center and radiating outward. If it glows unevenly, with bright spots on one end and dark spots on the other, the wraps are not making consistent contact.
To fix hot spots, release the fire button, wait for the coil to cool slightly, then use your ceramic tweezers to gently pinch the wraps together. Never touch the coil with metal tweezers while firing, as this creates a short circuit. Pulse and adjust until the coil glows evenly from the center outward.
A perfectly glowing coil is beautiful and functional. Even heating means even vaporization, which means consistent flavor and no hot spots that create burnt taste.
Step 5: Wick the Coil
Wicking is threading cotton through your coil to absorb and deliver e-liquid. This step has the most impact on your final vaping experience, so take your time.
Preparing the Cotton
If using cotton pads, peel away the compressed outer layers to reveal the fluffy inner cotton. Tear off a strip that, when rolled between your fingers, is slightly thicker than the inner diameter of your coil. The cotton should slide through the coil with light resistance. Too tight restricts e-liquid flow and causes dry hits. Too loose allows flooding and gurgling.
If using Cotton Bacon or similar strip cotton, pull off a piece and roll one end to a point for easy threading.
Threading the Cotton
Roll one end of the cotton to a point and thread it through the center of the coil. Pull it through until equal amounts extend from each side. The cotton inside the coil should be snug but not compressed. A good test: pull the cotton gently back and forth. It should move with light resistance, and the coil should move slightly with it without being dragged across the deck.
Trimming and Tucking
The cotton tails extending from each side of the coil need to reach the juice well (the reservoir in the deck) without being stuffed in tightly. Trim the tails so they just touch the bottom of the juice well. For RDAs, this is straightforward. For RTAs, the tails need to sit in the wicking channels without blocking them.
Use your ceramic tweezers or a small screwdriver to gently tuck the cotton tails into place. The cotton should look fluffy and natural, not packed or compressed. Think of it as laying cotton in place, not stuffing it.
Step 6: Prime and Test
Saturate the cotton completely with e-liquid. Drip directly onto the cotton inside the coil and on the tails. The cotton should be visibly wet throughout, with no dry white spots remaining. This initial saturation is critical: firing on dry cotton, even briefly, can scorch it and ruin the flavor until you re-wick.
Start at a lower wattage than your target (15-20 watts for a 0.5 ohm Kanthal build) and take a few gentle puffs. The vapor should be smooth, flavorful, and free of any burnt or cotton taste. Gradually increase wattage in 5-watt increments until you find the sweet spot where flavor is most vivid and vapor production satisfies you.
For a 6-wrap, 24 gauge Kanthal coil at 0.5-0.6 ohms, the sweet spot is typically 30-45 watts. Your personal preference will vary based on airflow, e-liquid, and desired warmth.
Troubleshooting Common First-Build Issues
Coil Reads Too High or Too Low
If resistance is too high, check for loose post screws, oxidized wire, or poor contact between the lead and the post. If too low, check for wire touching the deck, cap, or other metal surfaces. Also verify you have the correct number of wraps.
Dry Hits Despite Saturated Cotton
Your cotton is too tight in the coil, restricting e-liquid flow. Remove the cotton and try a slightly thinner piece. The cotton should slide through the coil with light friction, not require force.
Flooding and Gurgling
Too much cotton in the juice well, or cotton too loose in the coil. E-liquid flows faster than the coil can vaporize it. Try slightly thicker cotton in the coil or less cotton in the juice well. Also check that your wattage is not too low for the amount of e-liquid being delivered.
Spitting Hot Liquid
Usually caused by flooded coils or wattage that is too low. Increase wattage to vaporize the excess liquid, and fire the device for a second before inhaling to pre-heat the coil.
Muted Flavor
The coil may be positioned too far from the airflow, or the cotton tails may be blocking airflow channels. Reposition the coil closer to the airflow holes and ensure cotton is not obstructing the airflow path.
What Comes After Your First Build?
Once you have successfully built your first coil and experienced the flavor difference firsthand, a whole world of coil building opens up:
- Different wire gauges: Thinner wire (26-28 gauge) heats faster and works great at lower wattages. Thicker wire (22 gauge) takes longer to heat but produces massive vapor.
- Different wire types: Stainless steel works in wattage and temperature control modes. Nichrome has faster ramp-up than Kanthal. Nickel and titanium are for temperature control only.
- Twisted wire: Two strands of wire twisted together increase surface area and flavor.
- Clapton wire: A thin wire wrapped around a thicker core wire. Increased surface area and e-liquid retention create exceptional flavor.
- Dual coils: Two coils mounted side by side effectively double your heating surface area.
Explore our tanks and atomizers collection for rebuildable atomizers suited to every skill level, from beginner-friendly single-coil RDAs to advanced dual-coil platforms. Our PVS and Mods collection includes regulated devices perfect for powering your custom builds safely.
Building Confidence One Coil at a Time
Your first coil will not be perfect, and that is completely normal. Coil building is a skill that improves with practice. Your third build will be noticeably better than your first, and by your tenth build, mounting, adjusting, and wicking will feel like second nature.
The most important thing is to start. Get the basic supplies, follow these steps, and accept that the learning process is part of the fun. The first time you take a puff from a coil you built yourself and taste the difference, you will understand why so many vapers never go back to pre-built coils.